IBM Model F XT
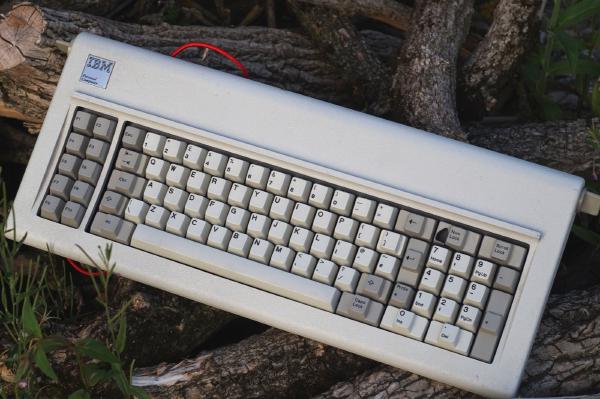
Introduction
When I first got into keyboards during the first lockdown in 2020 this was always the one I wanted most. When I finally got one, and put loads of effort into restoring it, I very rarely use it.
History
This is a keyboard that carries a lot of history. It was originally sold with the IBM 5150, otherwise known as the IBM PC, the computer that set the standard for personal computers.
Prior to the Model F the Beamspring was IBM’s main keyboard, and it was followed by the Model M. Today the Model M is possibly more recognisable outside of the keyboard community, but a large amount of people would consider the Model F to be superior.
I won’t go too in depth into history here, instead I’ll link to the Model F article on Admiral Shark’s Keebs site. See Model F keyboards. I would consider Shark to be the authority on most things IBM keyboard related, and his website offers a lot of information on the topic.
My Model F XT
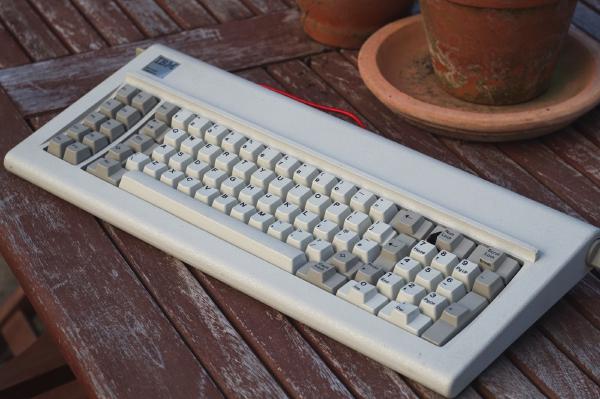
I bought this keyboard on eBay for around £120 IIRC, the restoring / converting process probably cost me that again on top, so all in this is the most I have spent on a keyboard, and probably the most I ever will spend.
This particular keyboard was manufactured in IBM’s Ireland plant in 1986.
Restoration
To call the restore process for this keyboard a par would be an understatement. I reckon I spent more time restoring this than I have spent using it since. I think I have wiped as much of it from my memory as possible, but I’ll document what I can.
Most old IBM keyboards have a part which is known to go bad over time and require some kind of restoration to get back to working condition. With the Model M it is the plastic rivets, and with the Model F it is the foam.
The construction of the keyboard internally is two curved metal plates, wedging together a PCB, and individual barrels for each key, this is padded internally by some foam. Over time this foam is known to rot, and when it does the process to replace is quite involved. If you buy a Model F keyboard, unless it has already been restored, expect to have to replace the foam.
Opening and closing the assembly was not an easy task, though I got a knack for it by the end because I had to do it so many times. I found what worked best was to bend the tab which can’t slide out, clamp the assembly with four ratchet clamps, and then hit the side on the floor in the direction it needs to move. Top tip: if there is anyone else in the house when you do this they will not be happy.
Once it was open I turned my attention to the front plate. I gave everything a good clean and then used a dremel with sander attachment to remove the old paint and bits of foam that had fused to it. Note: eye protection and a mask are a requirement whilst doing this.
After the paint was off I resprayed it using some off the shelf matte black spray paint. It looked way better after that, shame it’ll be hidden away inside the keyboard.
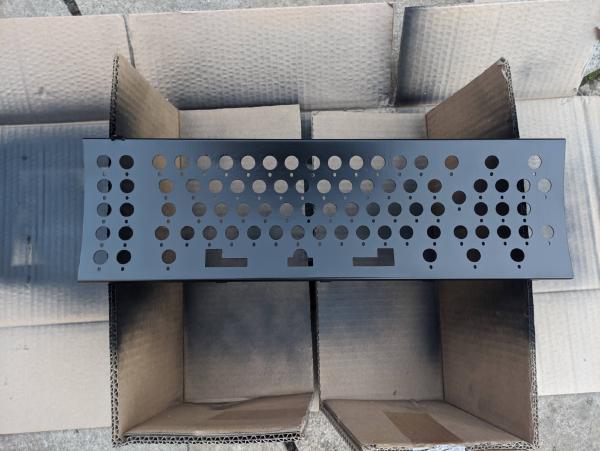
The original foam basically disintegrated when taking the assembly apart, but sourcing new foam turned out to be relatively straight forwards. I used some neoprene 1mm foam IIRC. I then used the barrel plate as a template to draw on holes in the right locations, and then a hole punch to cut them out.
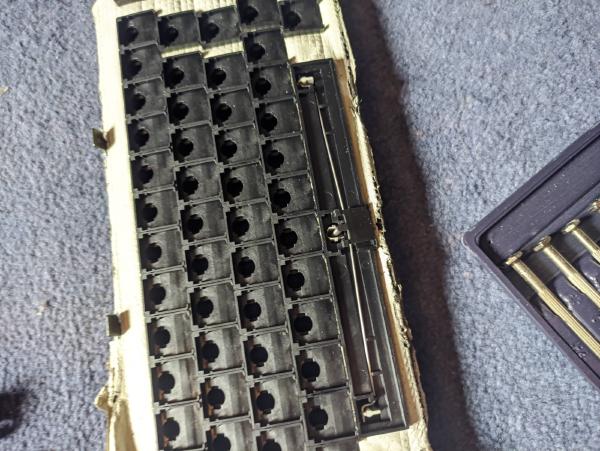
Now to clean everything. The keycaps I cleaned with denture tabs in warm water. The barrels were much more difficult. I used an ultrasonic cleaner (which I bought for this task and haven’t used since) to begin to dislodge the horrible sticky foam residue that coved each barrel, then I had to manually work at them with a cloth to get the rest off. This was by far the worst part of the process and took absolutely ages. For the case I just washed it in the sink with washing up liquid.
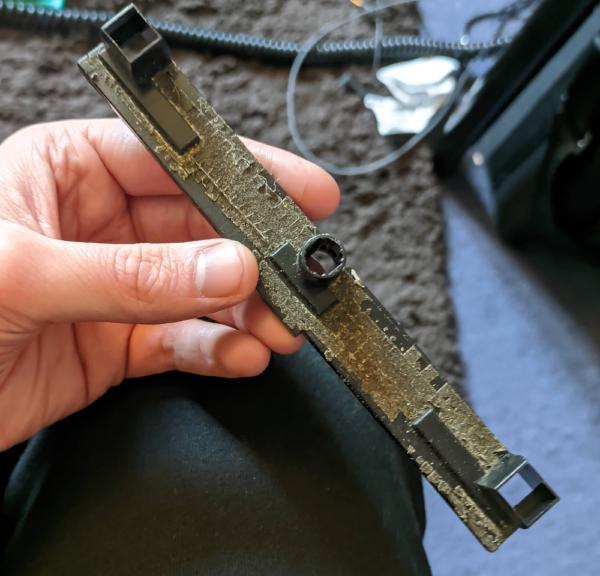
Whilst it was open I bent the spring for the space bar stabilizer as the space bar weight per IBM’s specification is ridiculous and not pleasant to use IMO.
Re-assembly was basically following the process in reverse. I used a stack of CDs to support the barrel plate either side whilst I reassembled everything. Once everything was in place I used the clamp and floor method to close it back up.

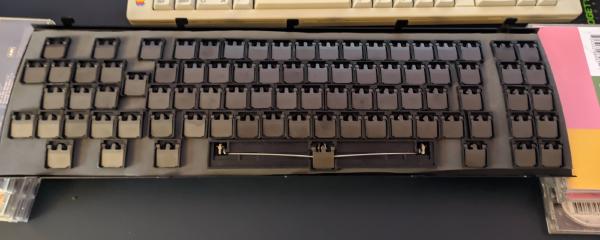
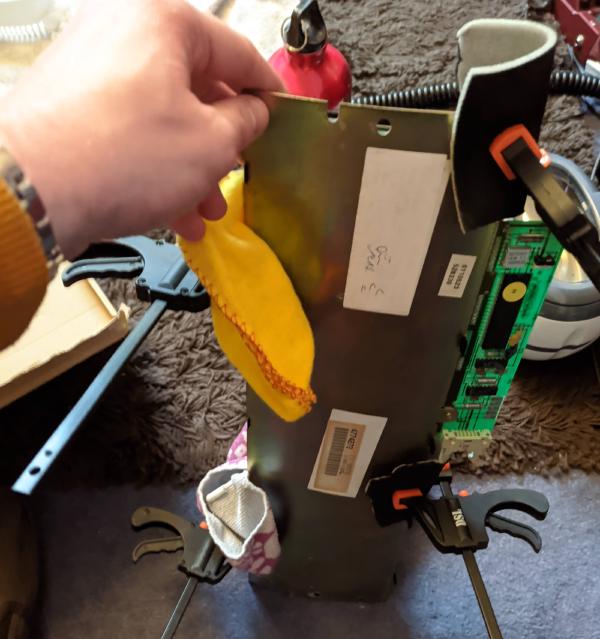
I don’t think this article does justice to just how much of a pain this restoration process was, so I’ll reiterate here, it was A LOT of work.
Converting the protocol
Most Model F keyboards use protocols which modern computers don’t speak. The F AT uses the AT protocol, which can be converted with a PS/2 to USB converter, but the others are all different. The Model F XT speaks XT protocol (unsurprisingly). Historically this has not been an easy protocol to use with modern machines, but thanks to the work of people in the community there are now a few options for converter firmware.
I used the TMK Keymap Editor to build a firmware for ATmegaU4, then I loaded this onto a Pro Micro and wired up a cable. I do have the original cable but I decided to do an internal conversion so I wired up a plug to use the internal header with some standard ribbon cable and a 7 pin DuPont connector. I was pretty happy with how this turned out, it looks pretty neat.
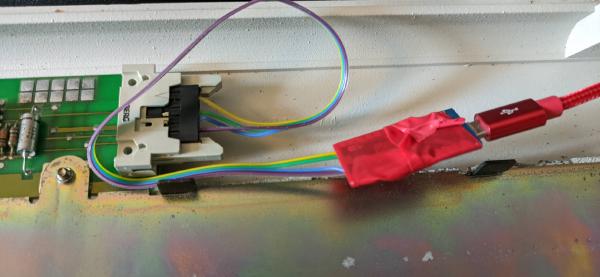
Since taking that picture I have added another wire from ground on the pro micro to the chassis, as it would occasionally start spewing out random characters until unplugged. It hasn’t done it since adding the cable but it’s still early days.
Edit: it did not fix it. I have also tried using an external converter with the original cable and experience the same issue. In fact if I tap the case pretty much anywhere, but especially above the controller I can trigger it do it fairly consistently. So I suspect the controller is bad.
A lot of people hate on the XT layout but I find it quite useable with the right mapping. Essentially I mapped the numpad to work like the middle block, so it mostly works like a TKL.
Endless troubleshooting
Once reassembled I found that some of the keys were unreliable. They would work if you pressed them hard, and then continue to work for a brief period of time, and then stop until hammered again.
I opened it up many times, cleaned the PCB with iso many times, cleaned the flippers many times, and eventually switched things around so it’s mostly the little used F keys that are intermittent.
It is still not perfect though, esc, T, and P are flaky, and I haven’t brought myself to open it again since. If anyone has come across this before and knows how to fix it do get in touch.
Is it good?
Yes… if you like that kind of thing.
I would describe the key feel as quite light, reducing the weighting on the space bar was definitely a necessary change. It’s also quite smooth feeling, the key feel isn’t very tactile, if you press very slowly you can feel a bit of a tactile bump, but at speed it feels more linear in my opinion. It is extremely noisy, if your reference point for a noisy keyboard is Cherry MX Blue this is way louder.
I find this keyboard to be nice for shorter periods of time, but for any extended use I find the noise quite grating. I think if it were a lot quieter but otherwise identical I’d probably use it a lot more.
The build quality is exceptional though, the plastic casing is incredibly thick, although these have been known to become brittle over time so can break. The keycaps in particular are very good, I don’t know if it’s just the amount of use that this one has had but the keycaps show very little wear. Apart from the one that’s cracked on the stepped part.
Conclusion
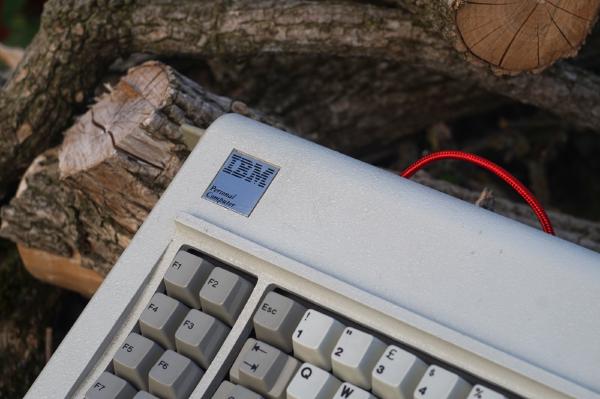
I put a lot of work in to this keyboard, and I don’t use it very often. If I knew how much I would use it after all the work would I still go through it again? Probably not. But equally I don’t think I’ll sell it any time soon. I put too much time and effort into it to consider getting rid. Also it is quite a historically significant keyboard.
Perhaps one day I’ll open it up again and have another go at fixing the temperamental keys, or at least swap those flippers over to the F row. Maybe then it’ll get more use.
Edit: I would also need to find a fix for the controller issue for it to be useable on the regular.
I think the main conclusion to draw from this is that I like the idea of clicky keyboards a lot more than I like them in practice.


