G4 iMac
Introduction
The G4 iMac was my first real introduction to Apple computers. At home growing up and in school the only current (at the time) computers I’d encountered were Windows machines. I remember seeing pictures of the G3 iMac and thinking it looked awesome but I never used one.
As a teenager I made friends with someone who’s family had mostly Macs, someone who has remained a good friend to this day. I think it must have been around 2006 when I first encountered his iMac G4. I remember being impressed by how cool the machine looked and by how well it ran on hardware that on paper looked a lot worse than the Windows machines I was used to using.
My friend’s computer was a 15" model with either the 700 or 800 MHz G4. If I had to guess I think it was likely the 700 Mhz model. It was a few years old at the time but still worked really well. Looking back on it being impressed that a four year old machine worked well sounds ridiculous, but things moved a lot quicker then and if you didn’t do a big upgrade every two years or so you would have to suffer through poor performance as a Windows user.
My friend kept that machine as his main computer for a good few years and he got a lot of use out of it. Growing up me and him started playing music at around the same time, him on guitar, me on bass. We spent a lot of time making and recording terrible music on that iMac G4, so it remains quite a nostalgic machine for me, as well as it still being the coolest looking iMac that Apple made.
My iMac G4
For a long time I have thought it would be super cool to use a G4 iMac as a monitor for a modern system. I did a little bit of research on it but didn’t really think seriously about it. Until recently a friend bought one with the idea of building an M1 Mac Mini into the base. I mentioned that I had considered doing the same thing and she sent me an eBay listing for one for £25 an hour’s drive away.
So that weekend two hours drive later and £25 shorter I was the proud owner of a 1 Ghz 17" iMac G4.
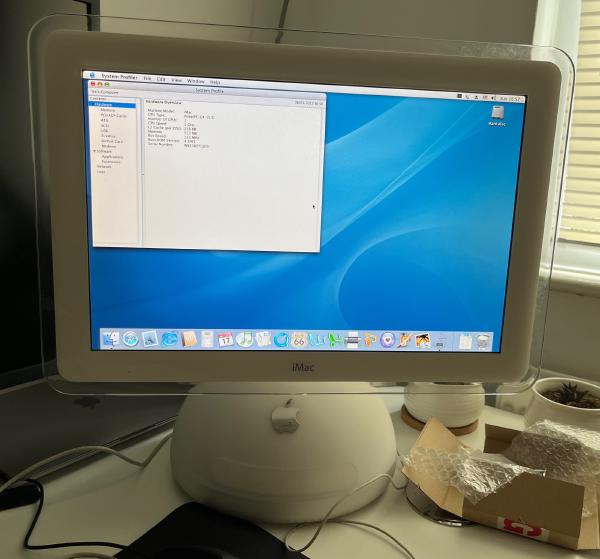
Initially I booted it up as was and had a play around with it. The previous owner hadn’t password protected it, or wiped it, so it still had all their documents on it. If you’re the previous owner and are reading this don’t worry, I didn’t snoop, and I drilled through the hard disk before binning it!
A brief venture into Sorbet
The machine initially had OS X 10.4 Tiger on it. However an amazing bunch of Power PC enthusiasts have created and maintain a patched version of 10.4 called Sorbet, which is essentially OS X 10.5 but patched for modern day use. See Sorbet Leopard Revision 1.5.
I set about installing that. To do so I had to first install OS X 10.5 so I could install a working version of Carbon Copy Cloner. Once installed I downloaded the Sorbet image and copied it across via USB (my god USB 1.1 is slow AF!). Unfortunately CCC was unable to extract for whatever reason, but I was able to extract using the internal Disk Utility after faffing around for a while.
Once booted the system was surprisingly useable, if quite slow. It only had 512 MB RAM so it’s probable I could squeeze some more performance out of it if I upped the RAM and swapped the HDD for an SSD. I was just about able to watch YouTube videos on it, and there is a surprisingly good Discord client available for PPC.
However the long germ goal of the machine was not to use it as a PPC machine.
Preparing to mod
I did quite a bit of reading around this, and went about it by a very long winded approach that I wish I hadn’t in the end. I ended up wasting ~£100 on stuff I didn’t use, and should probably go about selling at some point.
Whilst it would be super cool to build an M1 Mac Mini into the base (and they can fit) and keep it as an all-in-one I already have an M1 MacBook Air, which is my main machine. So for my purposes it made more sense to turn it into an external monitor.
There are a couple of options for doing this.
- Keep the internal display.
Dremel Junkie has loads of info on this. Including pinouts for every G4 iMac model, and step by step instructions. - Upgrade the display.
Apple tend to use 16:10 for their displays which limits the number of alternate displays, but 17" MacBook displays are the right aspect ratio so can be used. You can buy driver boards for these on AliExpress. macaron’s video on YouTube shows the process for this pretty clearly.
I was initially attracted to the display upgrade as I liked the idea of a higher resolution display, so I bought the right screen and a driver board off AliExpress. When this arrived I took apart the display to look about fitting it. The process requires quite a bit of cutting to fit the driver board behind the screen, as well as cutting away some of the bezel structure as the MacBook display sits lower.
I hadn’t realised quite how thick the metal in the display assembly was, and I didn’t have the right tools to cut through it. Given how destructive this process was I decided to pivot to attempting to use the internal display and kept the MacBook display upgrade as a backup.
After studying Dremel Junkie’s guide quite a bit I ordered the DVI adapter they recommended. I couldn’t find this on eBay so had to order from AliExpress and it was quite slow to ship. I also decided to use the original power supply.
Preparing the power supply
The first thing to do was to gut the original machine. I opened it up and took out everything except for the power supply. It’s fairly easy to disassemble and just requires a few different sizes of torx and Phillips screwdrivers. Once everything was out I gave it a clean internally, though it wasn’t too dusty considering the age of the machine.
The power supply is an always-on 12V only power supply in the 17" version (the 20" model also has a 24V rail). This means you don’t need to jump anything to get the power supply to work, it will always supply 12V when plugged in.
The display requires both 12V and 5V to function. In the original machine the motherboard steps 12V down to 5V and passes this back to the power supply to supply to other components that need it. To get 5V back I bought a 12V to 5V DC-DC step down unit. These are typically used for cars and easily available from eBay.
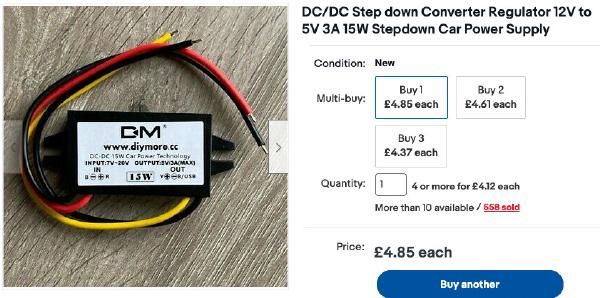
All the yellow cables into the PSU connector are 12V, all the black ones are ground.
I cut into two of the 12V lines from the power supply and hooked one into the step down converter, the other I kept to send to the inverter.
A molex power supply would also work fine as these have 12V and 5V rails. I used one of these I had lying around whilst the display was not connected to the base.
Getting the inverter working
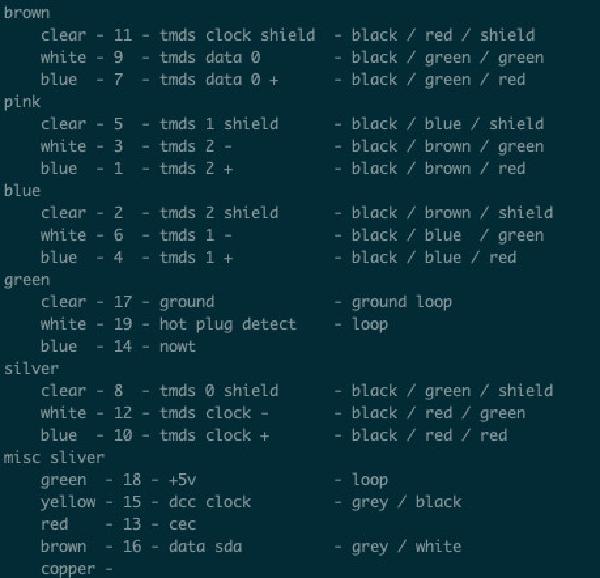
The inverter requires 12V and 5V to different pins to function. The Dremel Junkie guide suggests setting this up as follows:
- 12V to the blue cable.
- Ground to the black cable.
- 5V via 1k ohm resistor to the green cable.
- 5V to the red cable.
I would recommend trying this first, however it did not work for me. I have no idea why. After A LOT of trial and error the only way I could get it working was as follows:
- 12V to the blue cable.
- Ground to the black cable.
- 5V to green cable WITHOUT resistor.
- 5V from DVI to the red cable.
I could only get the inverter to flash briefly by taking 5V from the 5V step down. I tried several power supplies of different types, including ones with 5V rails and had consistent results.
Getting the display working
I followed the Dremel Junkie guide to wire up the display cable to the DVI header recommended on the article. Once this was all wired in plugging into my USB C hub I was able to get the inverter to come on and the computer detected the display as an iMac Display, but I would only get a black screen.
I redid the wiring many times, and even resorted to soldering the pins onto the DVI header. I thought I must have broken something so was kindly given another iMac neck by my friend who had a spare. After wiring this up I had the same results.
After many hours of trial and error out of frustration I decided to try my partner’s 2015 MacBook Pro as it has an actual HDMI out. Immediately I got a clear and stable display.
So the moral of that story is don’t trust USB C hubs. I tried several and none worked. These hubs work consistently with other HDMI devices. So no idea why they don’t work with this. I now have a simple USB C to HDMI converter which seems to do the job fine.
Once I had working display with the replacement neck and knew the USB C hub was the issue I decided to go back to my original neck.
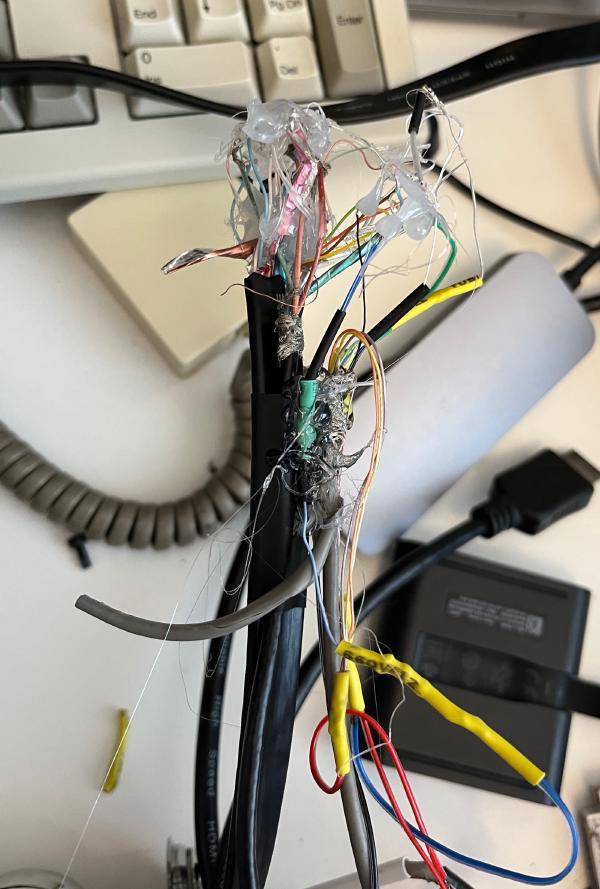
The pins from the original internal header were in a bad state at this point, and the thin cables are very awkward to deal with. So I decided to splice into a HDMI cable instead of attempting to solder to the DVI header, as my theory was that I would have more space to work with and it would be less awkward.
I cut into a spare HDMI cable I had, pulled up a HDMI pinout, and started probing with a multimeter. Once I had matched the pinout to the internal cables I stripped the ends and soldered as required to the internal cables.
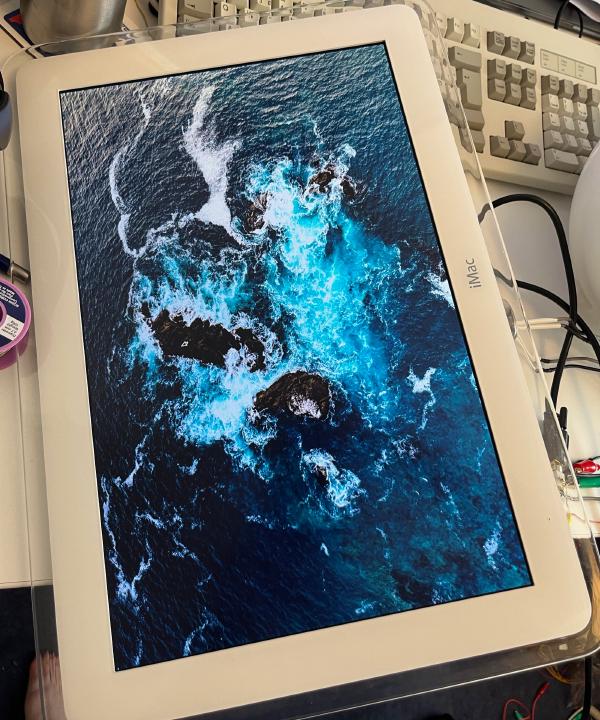
Once I powered it up it had a blue tinge, and turned out I’d got two of the cables the wrong way around when measuring it. After fixing that I was able to get a clear and stable image. I then covered the whole thing in hot glue to protect it and taped the original cable to the HDMI cable for security. It looks pretty horrible but gives a stable connection and should be protected against shorts so I was happy.
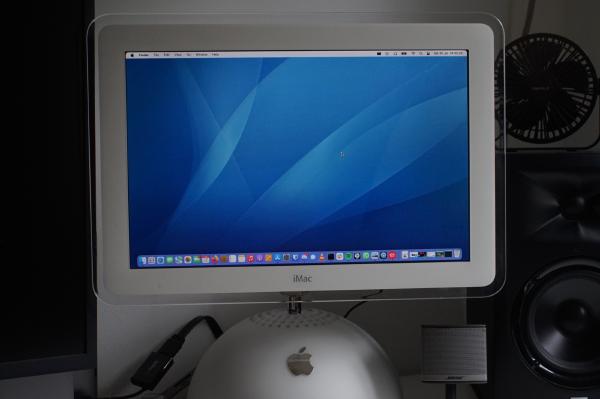
Finishing off
I then posted it through the neck hole, soldered the power supply cables, and reassembled for a final product. I should have taken some pictures of the insides before screwing back together, but I didn’t. I can go back and get some if there is demand for it.
Essentially now all that’s inside the machine is the power supply, the step down converter, and that ugly splice. The only thing I had to buy apart from the iMac was the step down converter. So the cost for the actual used stuff in this project, including the iMac itself was £30. But I spent ~£100 on stuff I didn’t use, including the alternative display.
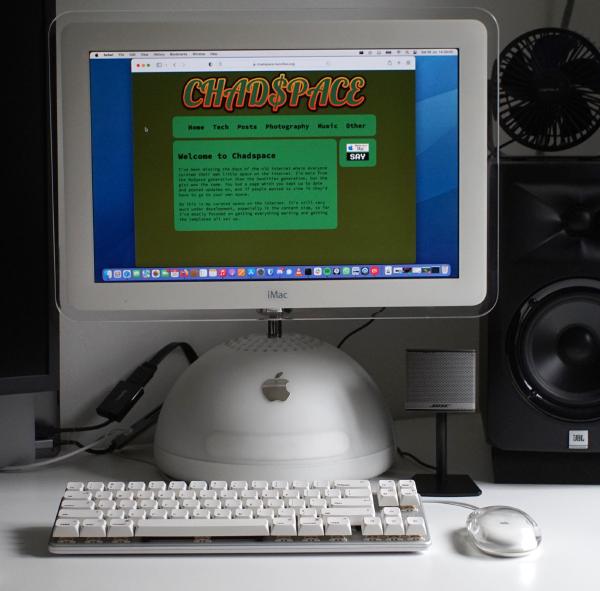
Making the OS feel more consistent
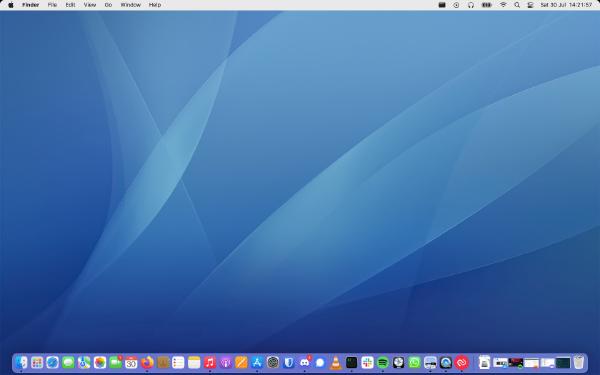
OS X has changed a fair amount over the years and ideally I wanted to make it feel a bit more period correct.
Desktop background
512 pixels hosts an archive of every default OS X background in 6K resolution. So I downloaded the Tiger one.
Menu bar rounded corners
Every version of OS X up until 10.5 Leopard had rounded corners on the menu bar. I always preferred that look and have used Many Tricks’ Displaperture to round off the top two corners.
Solid menu bar
Up until OS X 10.5 Leopard the menu bar was a solid colour. Up until the more recent versions of OS X it was possible to toggle to a solid menu bar, unfortunately Apple have removed this feature in recent versions.
I used a tool called ChangeMenuBarColor to emulate the solid menu bar. Essentially it takes your desktop background, adds a solid bar at the right place, and sets it as your desktop background. It’s a bit hacky but it is surprisingly effective.
Peripherals
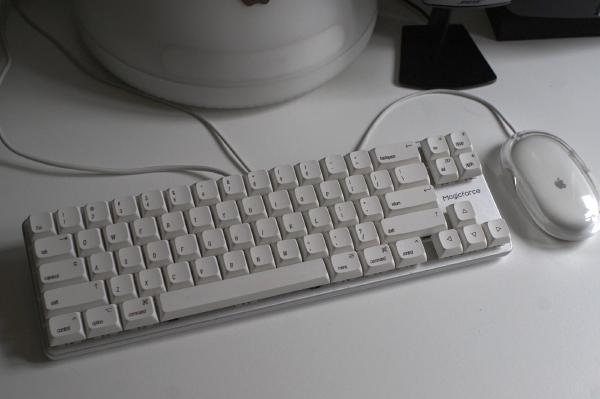
I did get the original keyboard, Pro Mouse, and Pro Speakers with this computer. The speakers weren’t in great condition, and the original keyboards were never great. The keyboard was also yellowed and contained a lot of dirt.
The Pro Mouse is still a nice mouse to use today, especially on a smaller display (it feels quite slow on 4K). Most sites and apps work ok without a scroll wheel, but occasionally I come across something that doesn’t work (like the servers list in Discord).
For the keyboard I’ve paired it with my MagicForce 68, with the switches swapped out to Gateron Yellow, and the keycaps switched with some vintage Apple inspired ones from AliExpress. It’s far from my favourite keyboard to use but it pairs well with this machine.
Summary

The modification would have been much less painless if I’d tried it earlier with a device with a proper HDMI port. I’ve not had issues with other displays with USB C adapters so I’ve been lulled into a false sense of security with them. I think it’s quite likely my initial attempt was fine and would have saved me about a week of debugging if I’d tried that first.
I’d recommend skipping the DVI header and splicing into a HDMI cable to others wanting to try this mod. Plugging the pins into the DVI header avoids soldering, but it becomes very fiddly if one of them gets damaged - which can happen very easily. And realistically you’re going to have to solder anyway to do the power supply, because I wouldn’t recommend keeping crocodile clips in long term. They can become disconnected and short too easily.
This was a challenging, and at times frustrating project. But I’m very glad I’ve got it working. It’s incredibly satisfying to use, and with the few tweaks I made to make macOS feel a bit more period accurate I feel like it really captures what I liked about these machines at the time.
Powering an older Power PC machine with a new Apple Silicon processor, skipping the Intel era, feels somehow quite appropriate.

